skip to main |
skip to sidebar
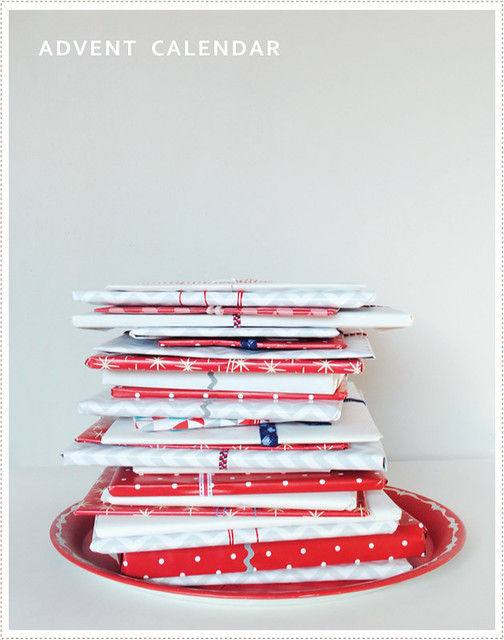
In addition to our Random Acts of Advent calendar, I wanted to introduce a new advent idea for this Christmas season. I love and adore children's picture books and, being an illustrator myself, have quite a collection of them. As of last year, I decided that I wanted to collect enough children's Christmas picture books to be wrapped, opened and then read every day in December up until Christmas. I was hoping to share this idea with you before the first day of December, but I just recently completed my entire collection of 25 Christmas themed picture books! So what a better day to share the advent fun but on the first day of December?
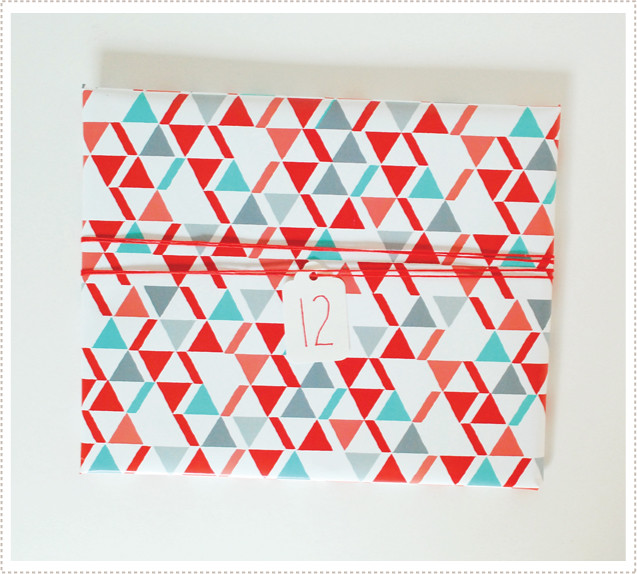
I had a lot of fun wrapping and adorning these books. I used a variety of papers including white butcher paper and a selection of really fun wrapping papers from Fifth & Hazel. The above geometric print is one my fav's.

I then used an assortment of trimmings and trappings including simple little tags on which I wrote the days of the month, counting down to Christmas.

I know a lot of advent's end on the 24th but I thought it would be fun to read one more story on Christmas night (the 25th) to end the season on a nice note.

Collecting 25 books might seem like an endeavor but it's actually not too bad as there as so many great Christmas and winter themed books out there. In fact, it might be hard to pick just 25! Our little collection began from a few books that were given to us along with a few we had purchased. Last year, when I knew I wanted to do this, I decided to wait until the after Christmas sales to purchase a number of books, which I highly recommend if you want to do this next year. I also purchased a number from the Scholastic book club, which made things more affordable. But I have to say, some of my favorite purchases were made recently from thrift stores. I was able to find an original Golden Book Rudolf and the super great Babaar and Father Christmas book. This one is utterly gorgeous and I can't wait to read it.
So these are the books we're going to be reading this December (and I have to confess that I can't vouch for all of them as I wanted to be surprised with a few of them as well...but I'm sure they're all going to be great).
1. Footprints in the Snow by Mei Matsuoka (I was drawn to the illustrations in this book)
2. Llama Llama Holiday Drama by Anna Dewdney (we haven't read this but my boys love the first Llama Llama book so I'm sure they will be delighted with this one)
3. Golden Book's The Christmas Donkey by T. William, illustrated by Andrea Brooks
4. I'll Be There With Belzon by Kirk Richards (Kirk is an old high school friend of Jon's and we love his work)
5. Babar and Father Christmas by Jean De Brunhoff
6. It's Christmas, David! by David Shannon
7. Stella, Queen of the Snow by Marie-Louise Gay
8. Christmas Tapestry by Patricia Polacco
9. Christmas Lights by Susan Mitchell (this book was given to Little A for his first Christmas. I love remembering those precious times when we read this and the boys love to see all the flashing ligths)
10. The Gingerbread Pirates by Kristin Klastrup, illustrated by Matt Tavares
11. Ho, Ho, Ho, Tucker! by Leslie McGuirk
12. The Stable Where Jesus Was Born by Rhonda Gowler Greene, illustrated by Susan Gaber
13. The Snowman, lift-and-look book, by Raymond Briggs (Love this classic and my boys can't get enough of the flaps)
14. The Elves and the Shoemaker by John Cech, illlustrated by Kirill Chelushkin
15. My Penguin Osbert by Elizabeth Cody Kimmel, illustrated by H. B. Lewis (I'm a big fan of Elizabeth Cody Kimmel - I was lucky enough to illustrate her Suddenly Supernatural series - and My Penguin Osbert doesn't disappoint. We love it.)
16. How the Grinch Stole Christmas! by Dr. Suess (a classic, need I say more?)
17. B is for Bethlehem by Isabel Wilner, illustrated by Elisa Kleven
18. Auntie Claus by Elise Primavera
19. Auntie Claus and the Key to Christmas by Elise Primavera
20. Golden Book's Rudolph the Red-Nose Reindeer
21. Angela and the Baby Jesus by Frank McCourt, illustrated by Raul Colon
22. The Nutcracker adapted by John Cech, illustrated by Eric Puybaret
23. Snowman at Christmas by Mark Buehner, illustrated Caralyn Buehner
24. For Christmas Even, First Christmas a changing picture book beautifully illustrated by Sophie Williams
25. and for Christmas night, we went with Silent Night, illustrated by Susan Jeffers

When the books were all wrapped I placed them in front of our fireplace. I'll have to find a new place for them when we want to light a fire of course but for now, we are enjoying it.

Oh and I had to share with you the vintage serving tray I found at a local thrift store. I'm seriously in love with it. I mean a retro fondue party scene? Does it get any better than that?

At any rate, we are excited to start the count down and I'm certain that this new little tradition will add such a nice touch to the season.
Now all we need is a tree...I'm thinking left of the fireplace should do quite nicely...
- Oh, and what I need from you now is for you to tell me your favorite Christmas book. With this new tradition, we'll always be in the market!

Hello friends! Thanks so much to those of you who took advantage of my Cyber Monday sale over in my shop. I always love to see what you are drawn too and I'm always so happy to see my little prints go off to enjoy themselves in your homes. In fact, I was especially delighted to spot one of my I Lovely Love My Family prints in a recent before-and-after dining nook makeover on Design Sponge. Kelly, of Let's Die Friends, did a great job and her makeover turned out fantastic. And I'm so flattered to see a spot of Lovely Love in her home!

And now on to some more good news! I have created a small batch of my very own Lovely Love and Love is Spoken Here pillows. I'm super excited about them! I am teaming up with a few of my favorite South Pasadena gals for a little craft fair of sorts and these pillows will be making their debut there. After that...whatever is left will be in the shop for you to have your pick from! So stay tuned.
Oh and I just found out that MerMag was listed as one of Babble's top 50 Design blogs for Mom! I'm so thrilled and very humbled to be listed among some seriously great gals with some seriously great blogs. Thanks babble!!
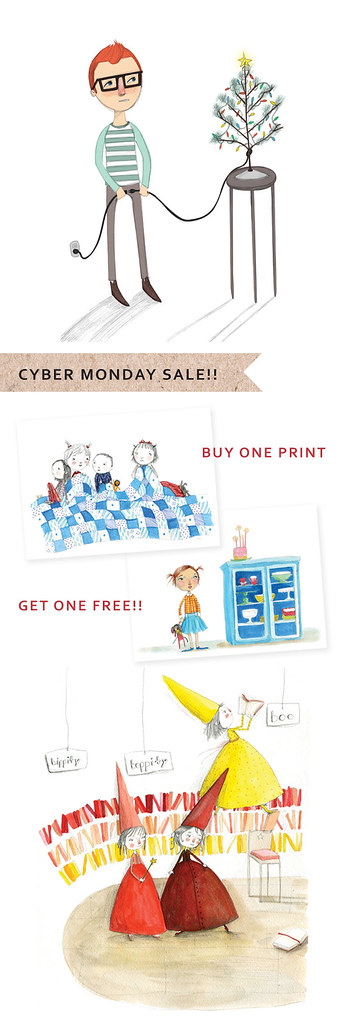
How was your Thanksgiving?! Are you stuffed to the gills and sick of the Black Friday crowds? I love how on Monday we can all sit in our jammies, recuperate, and...shop some more online!!! And...In celebration of Cyber Monday I'm offering a buy one get one deal in my Tuesday Mourning shop!
Just purchase the first print and mention in a convo which print you want for free!! I've listed a slew of new prints that you'll love. And your tried and true beloved prints are there as well! Happy Holiday Shopping!

Thanksgiving is just a couple days away, can you even believe it?! We have been put in charge of bringing pies and I'll be making my favorite simple, yet super delicious, apple pie. Jon is going to experiment with a caramel pumpkin pie of sorts. Yuumm, I'm getting hungry just thinking about it. Can't wait!
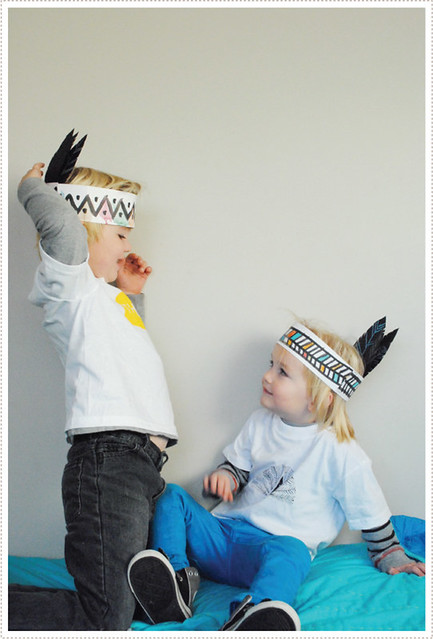
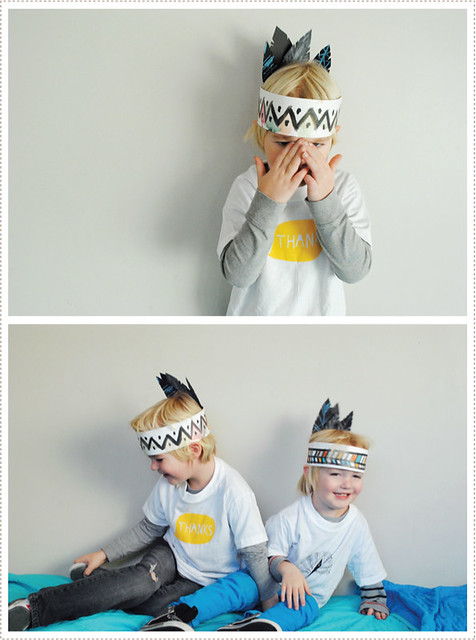
We have also been put in charge of coming up with a simple craft to keep the kiddos occupied while we cook, cook, cook! And I think we've come up with just the thing. These simple DIY festive turkey feather headbands are just the thing to keep your Littles entertained while you stuff those birds and mash those potatoes. And to make things extra easy for you, I've provided downloadable templates of both the headbands and the feathers.
I printed the headbands out on a 13"x17" sheet of bristol paper (but any sort of stiff cardstock/poster board paper should work). If you don't have a large format printer, you can take this file to your local copy shop and have them print out of few for you. You'll see on the template that I added a bit more of the pattern beneath as you'll most likely need it to wrap fully around your child's head. Once printed you can have your kids decorate the headbands with watercolors, crayons, colored pencils, you name it...basically whatever you kids are into and what makes things easy on you.

Little O really enjoyed delving into the watercolors. I painted a few spots to get him started and then just let him go at it.
I then created a number of feathers out of black scrapbook paper and had them decorate them with white colored pencils and chalk. Little O (3 years) did a little scribble and was pretty much done after that. Little A (5 years) on the other hand really got into it.

I was so in love with what he did. I was really impressed with his variety and restraint. On his own he chose to color one feather completely with white colored pencil. Then he did another where he drew in the feather lines with blue chalk. For the last one he chose to do just a touch of blue on the end of the feather. Love the variety kiddo. I'm seriously impressed. You'd think I was a proud mama or something :).

He then chose to decorate his headband with water colors after we adhered the feathers. True to his nature, he took it pretty seriously. Little O was adorable as he was completely enamored with what his big brother was doing.

I loved how they both turned out.
And the boys were very into them as well. In fact, they wore them the rest of the afternoon and into the evening.
I think they really loved doing something for Thanksgiving as they keep stating to me, in response to my Christmas music listening, "Mom! it's not Christmas yet. It's Thanksgiving!" It was like they were just waiting to officially do something to celebrate this holiday. I'm so glad too as it lead to a conversation about the first Thanksgiving and how so many came together in a time of celebration, despite their differences.

I also made a few freezer paper stencil shirts for them and Little O refused to take his off. For the cute little turkey I used this stencil from Alison's cute blog.
I'm so glad we did end up doing something festive for Turkey Day. They were so happy. And quite adorable.
And what about that black Friday shopping. Any plans? I hope to hit up a few shops...and then I'll being doing some sort of Cyber Monday sale at Tuesday Mourning, so check back in after you are stuffed to the gills and all rested up. Have a fabulous Thanksgiving week/weekend!

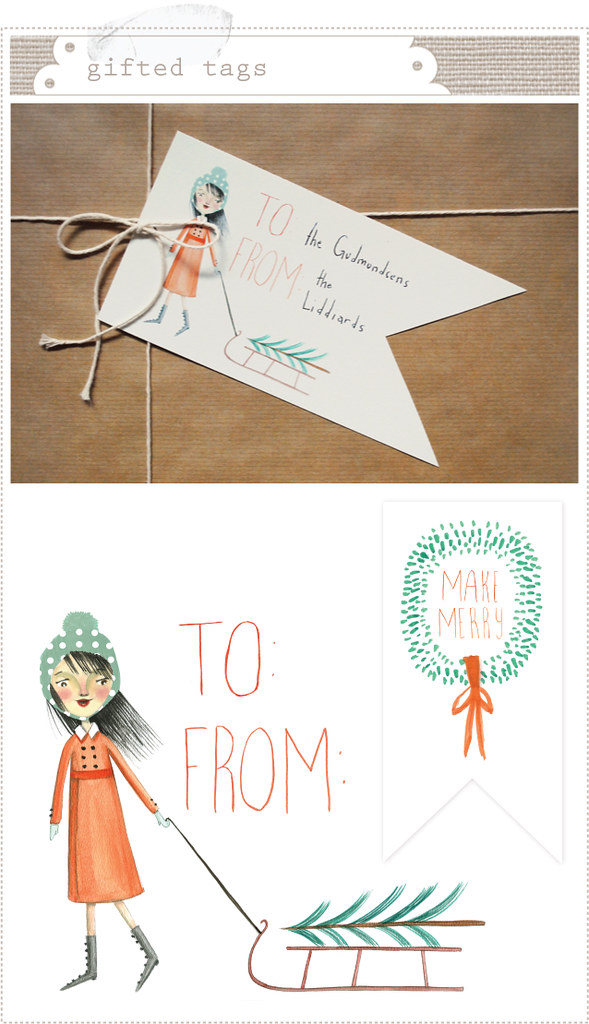
If you haven't yet been over to Creature Comforts to check out EZ's fabulous online holiday guide, Gifted, you should do so now. It's a fantastically curated guide chock-full of unique and of-the-moment gift items. EZ was so sweet to ask me to create some free downloadable gift tags for the guide and I couldn't be more happy to share them all with you. You can find them on page 136. I can't wait to get all my Christmas shopping complete so that I can get to wrapping, wrapping, wrapping!
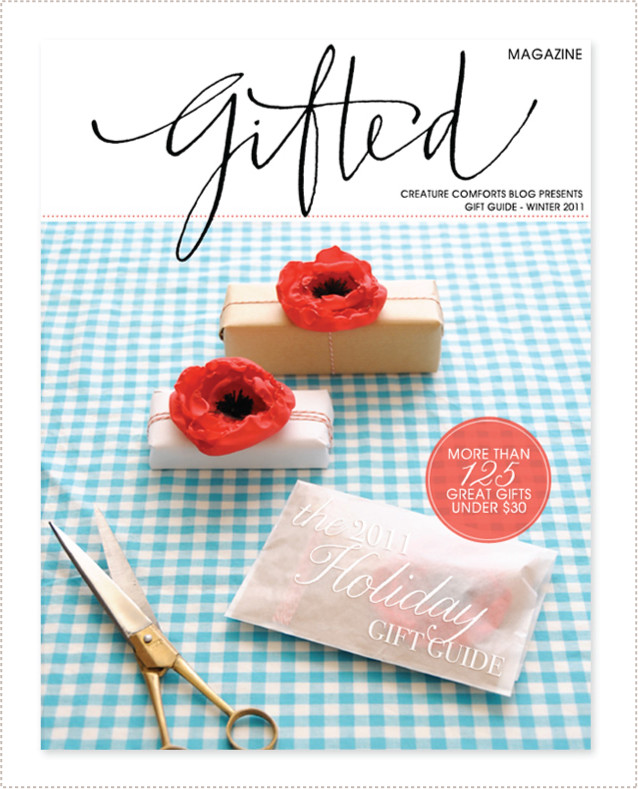
But before the wrapping, there is the shopping, shopping, shopping. And that's where EZ's guide hits a home run. I'm especially impressed with her round up of gifts for the guys (which, trust me, is not always easy). I would seriously get everything from pages, 20, 27 and 28 for Jon if I could. And after showing Jon, he wholeheartedly agreed. And I think Little A needs the ridiculously cute real tool kit by Romp on page 71 and Little O would love to dress up in the darling Kalon Studios masks on page 72.
And if you want to know how I stay in the spirit of things and somewhat on top of it all during the bustling season, take a look at my interview in last years Gifted guide on pages 15 and 16. And as far as favorite holiday jingles go, I simply must add the dreamy vocals of Zoe Deschanel in A Very She and Him Christmas. I've been waiting for this ever since I first heard her smoky voice in ELF and rest assured I haven't stopped listening to it since I nabbed it at Barnes and Noble last week!
So now to that shopping, shopping, shopping....
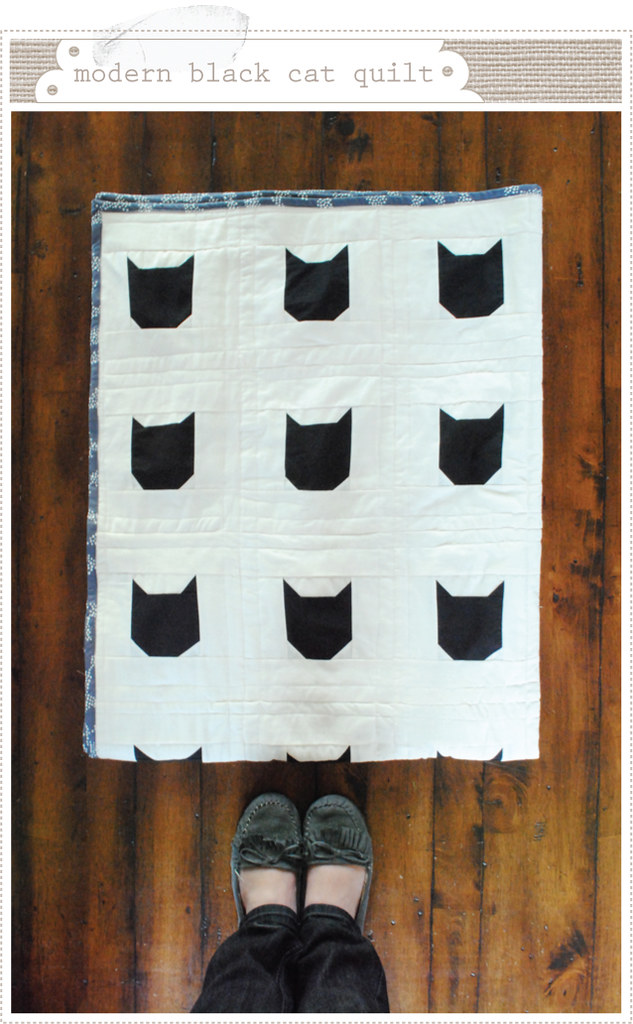
OK, so I officially have the quilt bug. I get it. While my quilts up to this point have been very simple, I understand why spending long hours, working on intricate patterns and tiny stitches is completely worth it...and...slightly addicting.
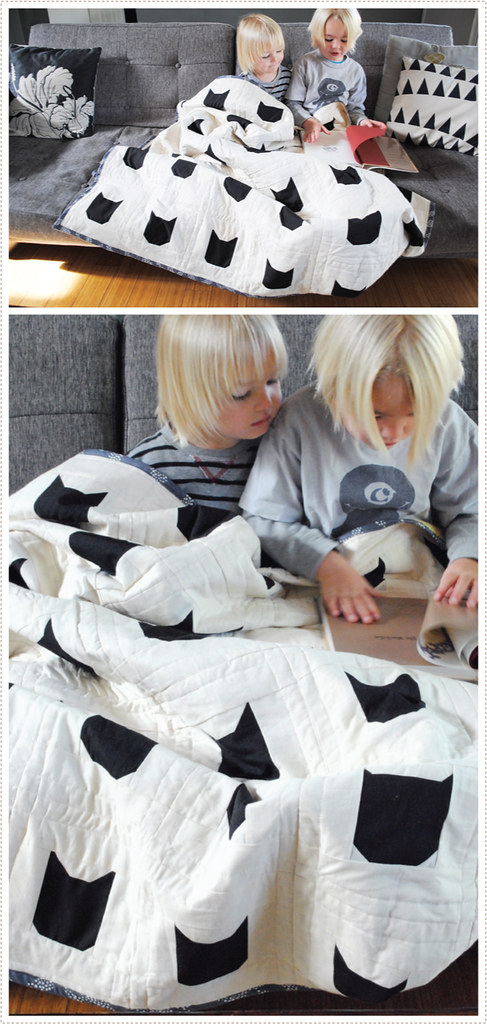
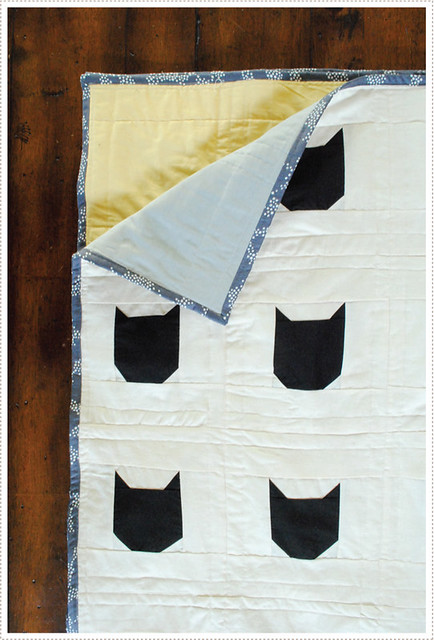
I've had in my mind a simple modern black cat quilt idea for a year now. I wanted to do it last year around Halloween/Fall but didn't get to it. The idea was still intriguing to me this year and I knew I had to do it. After things got settled here I quickly got to work and managed to get this done just in time for the season. And we have loved every stitch of it since.
The boys have spent many a moment curled up on the couch with a book, all snuggled up in our new cotton creation. I knew that I loved it but I was especially pleased to see that the boys really have taken to the quilt as well. They just knew that it was something a little more special than our typical throws (they had seen me work on it so they had a rough idea of how it came to fruition). And Little A loves that it has a cat motif (we call him A-Cat as a nickname). In fact, he asked me if he could take it with him to bed tonight, and I let him...just this once.
After a bit of trial and error I came up with a patchwork construction that I was pleased with and I'm more than happy to share the step-by-step process with you here. If you have ideas to do this quicker/easier/better/etc. please do share! (I recently did a quilt where I cut up a bunch of triangles and then at the end of it all I realized that I didn't need to cut so many triangles! I could have just done one large one and then later quilt it down the middle. That's what I get for just winging it! :)).
OK, so to start, you will need to cut the following shapes in the following sizes (or adjust to whatever ever size you prefer). I have 42 cats total so the following cutting instructions are for this amount. I chose to go with all black cats to keep things graphic and modern but I think a gray to black ombre affect would also be fun as well as an assortment of similar toned patterned fabrics.
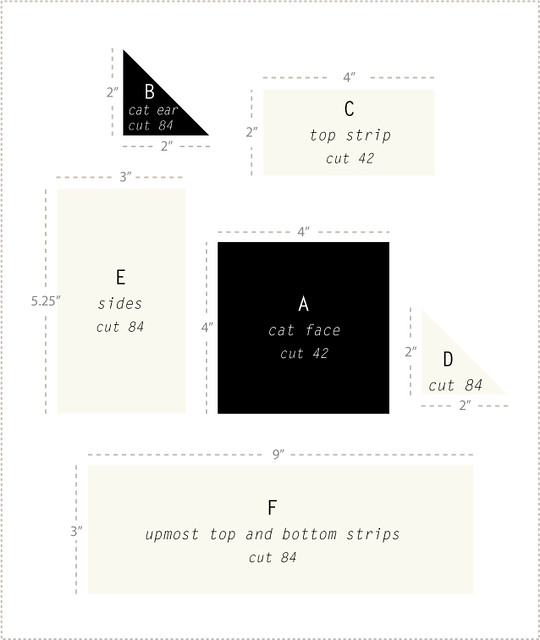
Once you have all of your fabric pieces cut, you can proceed to piecing the quilt squares together.
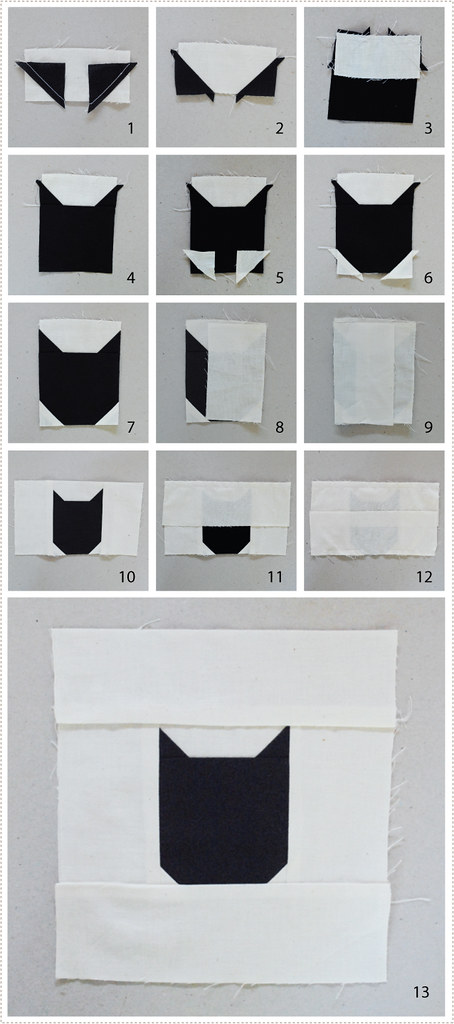
1. Sew two B triangles onto one C strip as per the photo. Let the tips of triangles hang over just a hair.
2. Turn down triangles (cat ears) and press.
3. Turn strip with ears around and sew to A (cat face).
4. Turn around, flip ears up and press.
5. Sew two D triangles onto the bottom of the cat face as per the photo, leaving tips of triangles hanging over the edge a bit.
6. Turn lower triangles down and press.
7. Trim excess fabric.
8. Sew one E rectangle piece to right side of the cat face.
9. Sew the other E rectangle piece to the opposite left side of the cat face.
10. Turn sides over and press.
11. Sew F rectangle to top edge as per photo.
12. Sew second F rectangle to bottom edge as per photo.
13. Turn top and bottom rectangle pieces out and press.
From there proceed to finish all cat quilt squares (I know it seems like a lot but pop in a movie each night while you are working on these and you'll have them done in no time!). Every quilter has a different take, but I must confess that I don't mind the imperfections that I experienced along they way. There were a few quilt squares that I set aside there weren't "perfect". The cat ears were to small, or not even, or there was some other quirk. In the end, I couldn't bare to discard them. They were part of my quilting journey and each told a little story (I can seriously remember what I was specifically watching or talking about during a couple of these squares). I had to include them and I'm so glad I did. For me, they add so much to the quilt story.
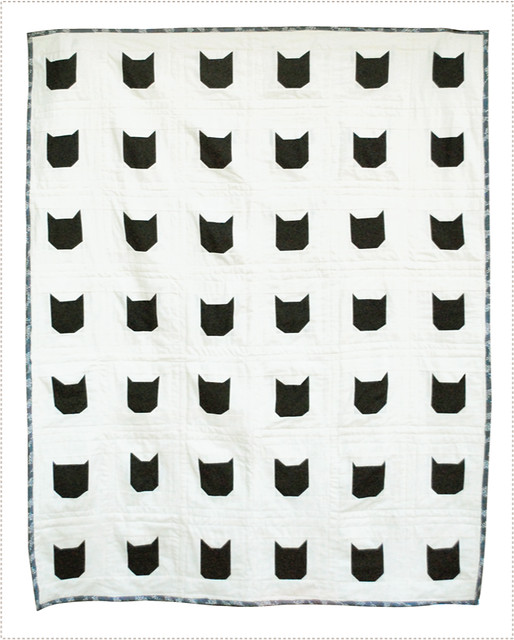
Once quilt squares are complete, proceed to sew them together one row at a time. Then sew each row together, being careful to align seams.
From there proceed to baste together your top patchwork, batting and back of your choosing (you can find a number of tutorials for how to do this on various quilting sites and blogs and youtube).
For my back, I literally pieced it together from scraps I had with no prior planning. That is what I love about quilt backs, you really have free reign and can have a lot of fun with it. I then chose a simple quilting stitch that really highlighted the cat squares (and was easy for me to do on my personal machine).
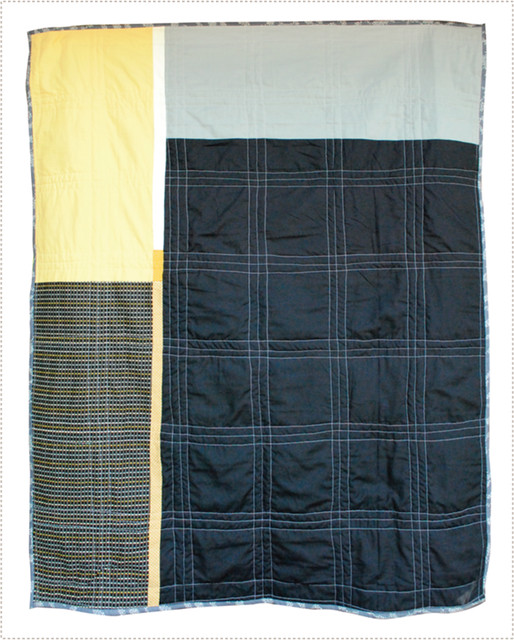
And I must say, one of my favorite parts of the quilt is the binding. I spent a lot of time pondering and searching fabric stores for just the right look and I was so happy to have found the fabric that I did. It just makes me smile when I see it.
And as much as my boys love this quilt, I think I might love it a tad more.

I've done a couple of quilts geared for my kids but I have to confess...as much as they love this...it's secretly a quilt just for me. It makes me so happy to look at it and even more so to cuddle up in it with my boys, with Jon ;), a good book or just for a little snooze.
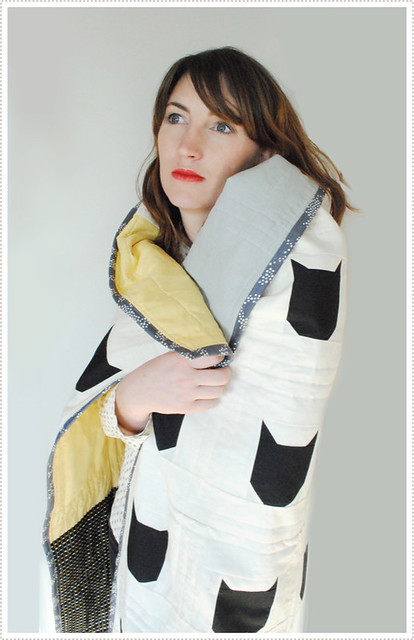
And that is what I love about handmade quilts. They are so much more than just a blanket. They bring joy, comfort, warmth, love and a smile to your face. And there have been a number of smiles in our house as of late.
Hope you all had a most wonderful Halloween full of spooks, spirits and seriously good loot. We certainly did and let me tell you, we are plum tuckered out.
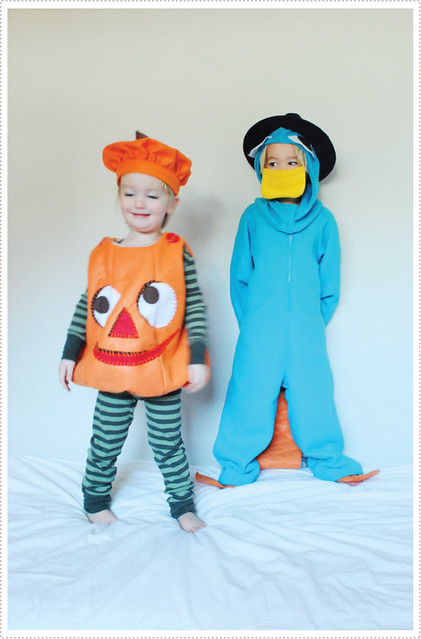
The boys had very specific ideas for what they wanted to be this year and to my initial chagrin, they did not go together. I wasn't sure what I wanted to do about this (try to convince them to pick something themed? etc.) but in the end I just went with it. I was happy I did as it brought an entirely new level of Halloween happiness to the Littles, and in turn myself.
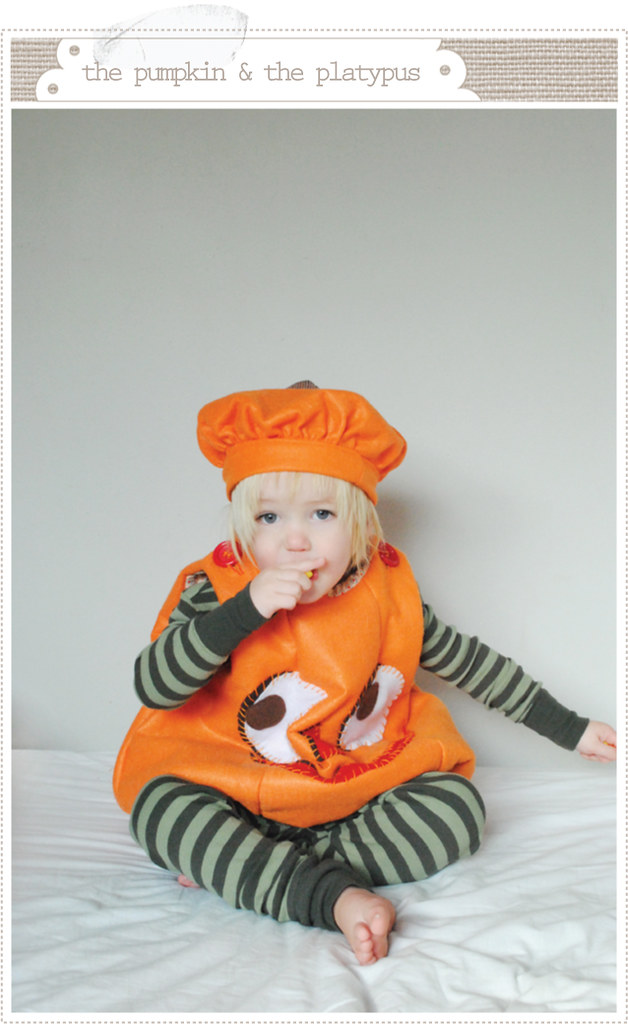
Li'l O told me very early on, and emphatically, that he wanted to be a "puh'kin". He's a lover of all things authentically Halloween and after some initial apprehension, I couldn't be happier at his choice.
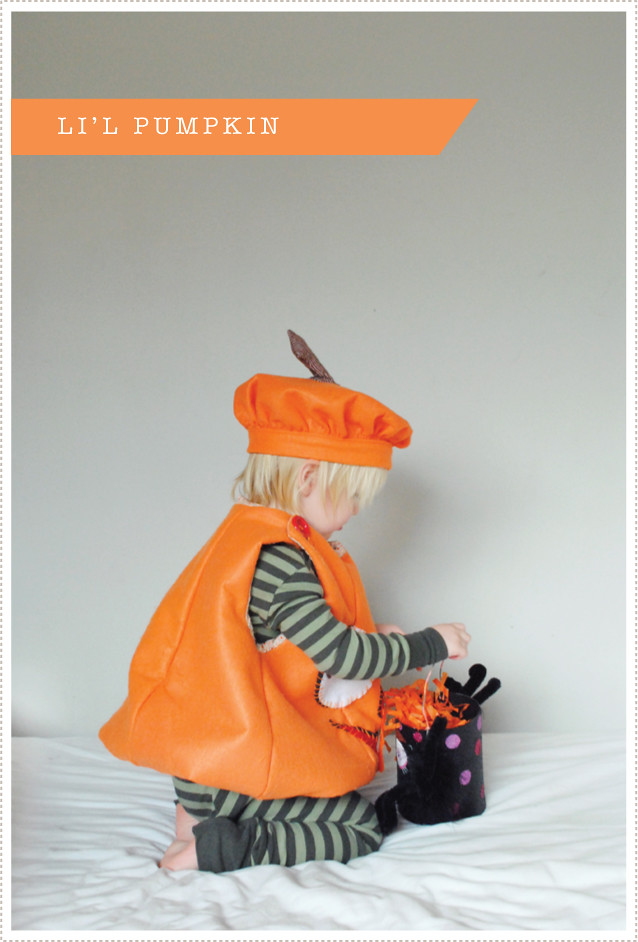
Initially I wasn't sure what to do to make this tried and true Halloween classic interesting for me and something we could call our own. But as we explored ideas, I happily settled on something playful, with a vintage vibe to it.
For the basic pumpkin shape I used the Simplicity 0418 pattern. I chose an orange felt for the exterior of the pumpkin and a simple vintage looking fabric for the lining. I switched up the shape of the stem and chose to go with buttons instead of Velcro to hold the straps together. 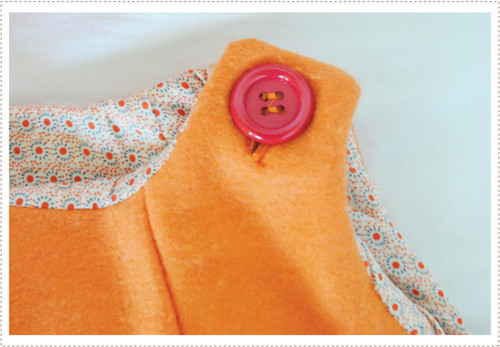
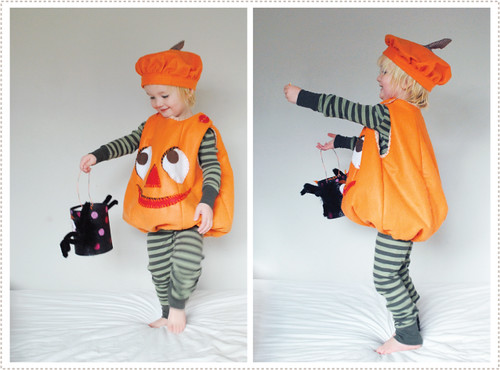
For the green striped "jammies" worn underneath, I took a couple of women's shirts I found at Walmart and refit them to work with Little O's proportions. I took the top in quite a bit at the sides, chopped the length and cut off the cuffs and sewed them back on a little higher. The leggings were a bit more complicated. I made these from a woman's XL shirt, using the arms as the legs. It was all pretty piecemeal and a bit haphazard, but it worked out well enough for us. For the face I used felt to create a vintage, cupie doll looking face which I then hand stitched onto the front.
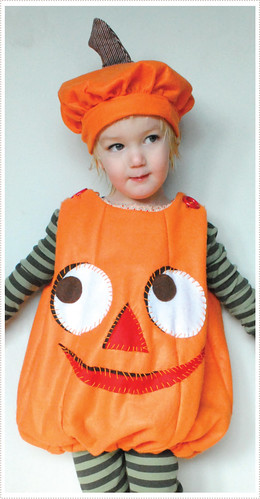
Little O looked adorable in it and I couldn't be happier with his classic choice.
Little A was also very opinionated about his costume this year. After exploring a variety of ideas, he decidedly settled on Secret Agent Perry...the Platypus...from the ever popular cartoon (or at least in our house), Phineas and Ferb (thank you Netflix online...). I wasn't entirely sure what to do for this but he was dead set on it so it was full steam ahead.
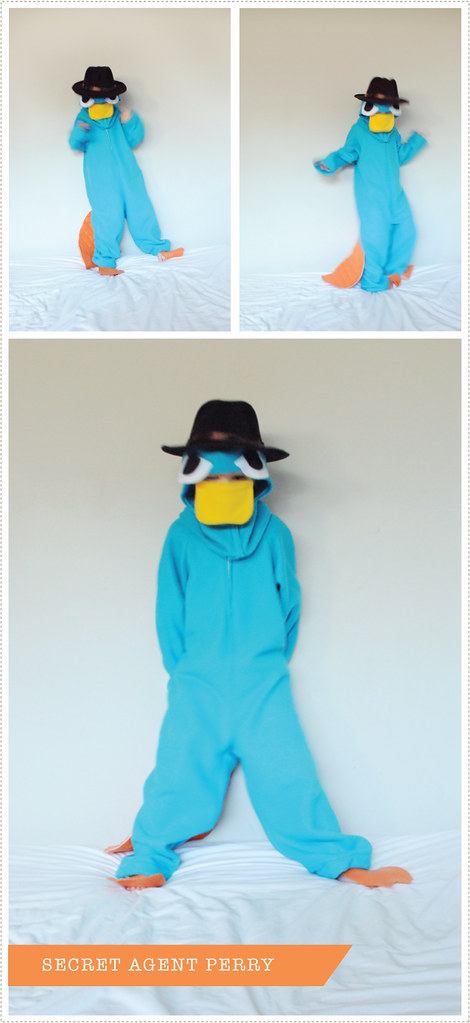
I used Butterick pattern 3238 to create the basic body suit and hood. For the tail I put batting between two pieces of orange felt and machine quilted the diamond pattern and then sewed the platypus tail in place of the the tail used in the pattern. I then sewed simple felt eyes on to the top of the hood. Jon found a great hat for only five dollars at the costume shop and I made a simple beak out of yellow fleece.
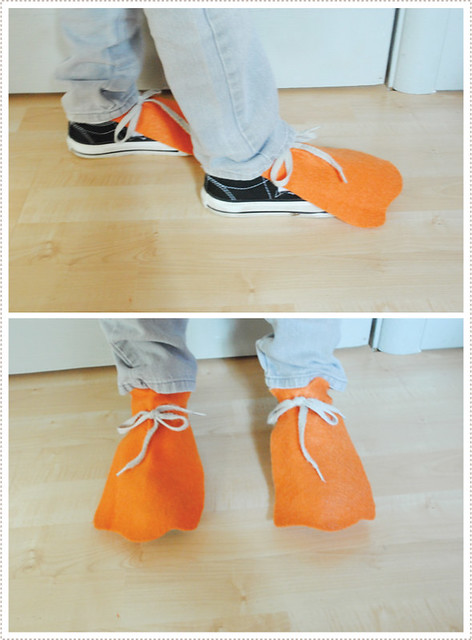
For the feet I cut out simple felt shapes and sewed elastic to the backs. To prevent the feet from continually turning around and around his ankle, I punched a couple of holes in the top and pulled his shoe laces through and tied the laces atop. This ended up working out great.
It was fun to see how much he lit up when he put the costume on. He immediately turned into "Secret Agent Perry" and started to make "secret agent" stances. He also told me that he couldn't talk when he wore it because Perry the Platypus doesn't talk. It was pretty much awesome.
Not many adults knew who he was but with his fellow five-year-olds, he was a hit. And that was all that really mattered to him.
This year I really learned the magic of making your kids dreams come true. While it's very fun and magical presenting new and fun things to your kids...things that they couldn't dream about until you made that world possible for them, it's all together an entirely new thing making their dreams come true (both are important I think). It was so great to see little A's face light up with delight when he first saw himself as "Secret Agent Perry". And I have to say, it's one of the most gratifying things as a parent to see what your child's personality brings to world. I can hardly wait to see what the future holds for us!
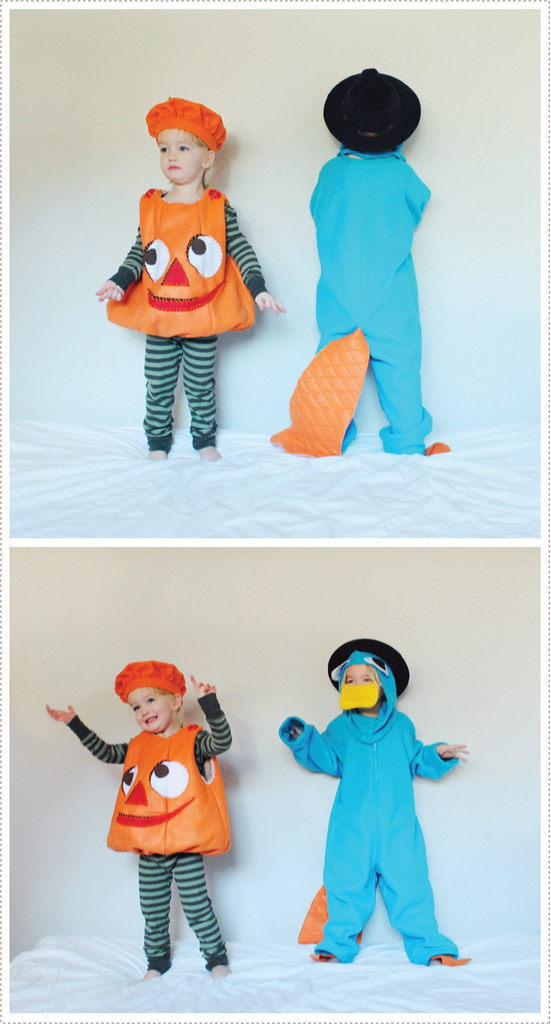
I have to admit that after I was halfway through with Little O's costume he started listing several other costume ideas that he wanted to entertain. This was new to me as Little A never did this at his age (although he did do it this year). I decided to instill a new "once mom purchases the fabric, no more costume changes" policy. This worked well with Little A (who initially wanted to be a ninja, then Perry, then Bowser...and so on) but did not compute too well with a three year old. In the end, I decided not to worry too much about it and hoped that he would put his pumpkin on if he wanted to get candy. And well...it totally worked. He loved it and was more than happy to gear up and get going on getting candy, candy, candy!

By the end of the night, as with this photo shoot, the boys were tuckered out. We really didn't get very far before Little A just started sitting on the porch after ringing the door bell. The home owners were thoroughly entertained by this and I'm sure got the impression that we'd be trucking up and down the streets for hours. So after only about eight houses we called it quits and ended the night with cousins and grandparents. I was definitely OK with this as I'd been scheming up ways to prepare for the massive amount of sugar intake that was sure to ensue. However, having only gone around for a little bit, their treat bags were just full enough to be fun, yet sparse enough to keep a mother (and dentist?) happy.
It was a great haunting holiday for all of us. Here's hoping that you too had a very Happy Halloween!
|